Installing multiple solar panels using parallel branch MC4 connectors
Installing multiple solar panels using parallel branch MC4 connectors involves connecting several strings or branches of solar panels in parallel to the main solar PV system. Here’s a step-by-step guide:
- Plan the Installation:
- Determine the layout and placement of the solar panels based on available space, sunlight exposure, and system requirements.
- Calculate the total number of solar panels needed and divide them into parallel branches, considering factors such as shading, panel orientation, and electrical load distribution.
- Prepare the Solar Panels:
- Mount the solar panels securely on a suitable mounting structure or racking system, ensuring proper orientation and alignment for optimal sunlight exposure.
- Ensure that the solar panels in each parallel branch are of the same type, size, and rating to maintain voltage and current consistency.
- Prepare the Cables:
- Cut photovoltaic cables to the required length for each parallel branch, ensuring sufficient slack for connection and routing.
- Strip the insulation from the ends of the cables to expose the conductors, typically around 8-10mm for MC4 connectors.
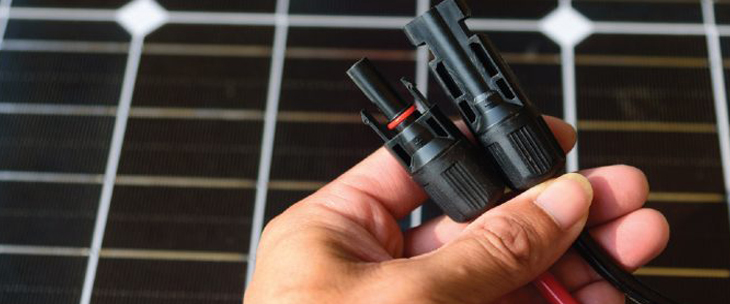
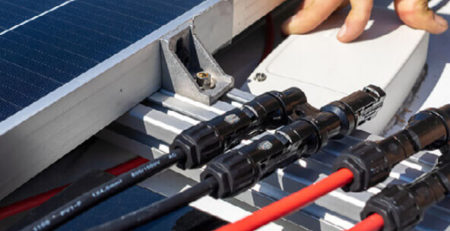
- Assemble the MC4 Connectors:
- Assemble MC4 connectors onto each cable for both the positive (male) and negative (female) ends.
- Crimp terminal pins onto the exposed conductors of the cables if using crimp-type MC4 connectors. Ensure a secure and tight connection.
- Insert the stripped conductors into the appropriate slots on the connector and tighten the screws to secure them if using toolless MC4 connectors.
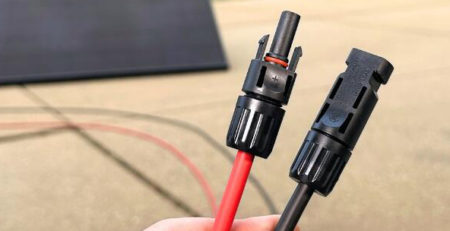
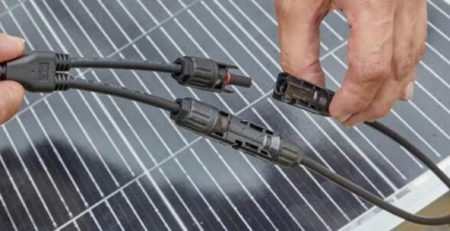
- Connect the Solar Panels in Parallel:
- Connect the positive (male) and negative (female) ends of each solar panel to the corresponding connection points on the main solar PV system.
- Connect the positive (male) and negative (female) ends of each parallel branch to the corresponding connection points on the main system.
- Ensure that the polarity is matched correctly (positive to positive, negative to negative) to avoid reverse polarity connections.
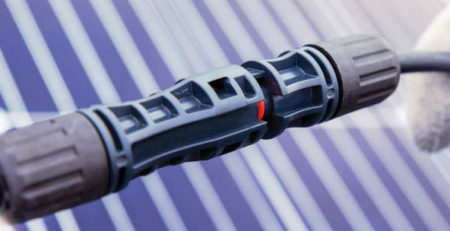
- Secure and Weatherproof Connections (Optional):
- Use cable glands, junction boxes, or weatherproof enclosures to protect the connections from moisture, dust, and environmental elements.
- Apply electrical tape around the connection points to provide additional weatherproofing and strain relief.
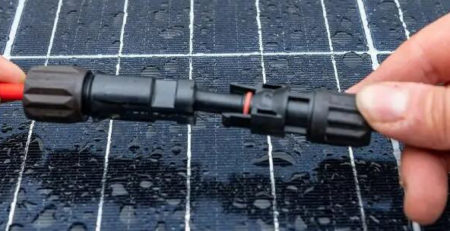
- Test the Connections:
- Once all solar panels are connected in parallel, test the continuity and integrity of the electrical connections using a multimeter or continuity tester.
- Verify that there are no loose connections, exposed wires, or signs of damage.
- Secure and Route the Cables:
- Secure the cables to the mounting structure or cable trays using cable clips or zip ties to prevent them from hanging loose or getting damaged.
- Route the cables neatly and safely to the main solar PV system, avoiding sharp edges, heat sources, and potential obstructions.
- Label and Document Connections:
- Label each parallel branch and connection point for easy identification and future maintenance.
- Document the connection scheme and labeling for reference and troubleshooting purposes.
By following these steps and ensuring proper installation practices, you can connect multiple solar panels using parallel branch MC4 connectors effectively and efficiently. If you’re unsure about any aspect of the installation process, it’s advisable to consult a professional electrician or solar installer for assistance.

Leave a Reply